Red and LIme Green Christmas Tablescape Idea
By The Style Sisters - Monday, November 26, 2018
I am so excited to show you my Christmas Tablescape idea!
First up the napkins- My cute mom made these napkins for me years ago. They are made from painters drop cloth and she used Laser transfer paper that you print from your printer and then simply iron it on. I've used them over and over and washed them a million times and they have held up perfectly! Are you seeing the cute silverware paper? More about that in a minute.
First up the napkins- My cute mom made these napkins for me years ago. They are made from painters drop cloth and she used Laser transfer paper that you print from your printer and then simply iron it on. I've used them over and over and washed them a million times and they have held up perfectly! Are you seeing the cute silverware paper? More about that in a minute.
I really do love red mixed with lime green. I bought these bright red chargers when I lived in Texas at Garden Ridge (I miss that store). The lime green salad plates and the green goblets are from Pier 1. Check out these other tablescapes where I used the lime green salad plates and red chargers
On each napkin I placed a sprig of evergreen and a small plastic red ornament...I've used glass before but inevitably one breaks :(
My mom or sister bought this cute red cake plate for me a few years ago..I love it! I can place a doily over the Christmas tree and use it for Valentines Day or the 4th of July!
The Sparkle- I draped my chandy with the same garland I used on my Christmas tree...so festive! The tree in the center works perfectly with its red and lime green berries. I used large red ornaments all around the base and white cups with black and white striped straws.
I am in love with this silverware paper! I used it for my Thanksgiving table as a runner but this time I cut 6 pieces to use as placemats and I still have lots left over! I bought it from a darling shop called Nest Boutique...see link below.
Over in the corner is my Hot chocolate Bar...if you missed that post you can see it here. I just noticed the fabric on my chairs flow really well with the color scheme. I might need to change out the turquoise artwork in the white frames...remember last year I did pastels in this room.
I. Love. this.
I bought my roll of paper at my friend Brittany's shop called Nest Boutique that is right by my house but you can find similar papers as well as super cute clothes and lots of other fabulous home decor in her online shop at Nestboutique Tell Brittany Hi for me :)
What are you doing for your Christmas Tablescape this year?
linking to
Pom Pom Christmas Decoration Ideas!
By The Style Sisters - Sunday, November 25, 2018
I am obsessed with pom poms this year!! Mostly I just love saying Pom Pom's hahah I love looking at all the amazing ideas on how to use them as Christmas decorations and I love the bright colors too! Here is a sampling of some I found looking for inspiration on the internet.
Nest of posies amazing pom pom wreath!!
Dig this Chick- Simple pinecone decorations bring back memories for me of being a kid
Tater Tots and Jello shows how to make these adorable pom pom Christmas trees and wreath!
Erin With A Y shares her pom poms on her deer head
I am dying over this pink pom pom Christmas tree pillow from Thistle Wood Farms
Last but not least I still love my own Pom Pom wreath I made a few years ago too!
Are you going to use Pom Poms in your Christmas decor this year?
Christmas Tree Napkin folding tutorial
By The Style Sisters - Friday, November 23, 2018
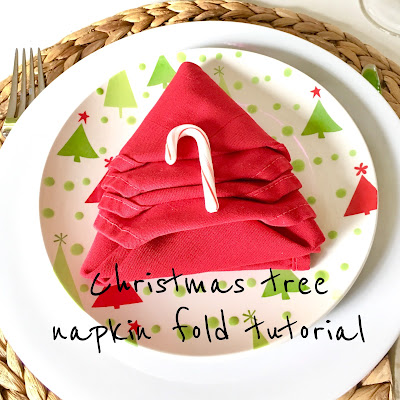
I love this cute napkin fold for Christmas! You may have seen it on my Winter wonderland tablescape that I did last week...it just makes the place setting look a little more special.
I start with a square napkin
Fold in half
fold in half again to make a square
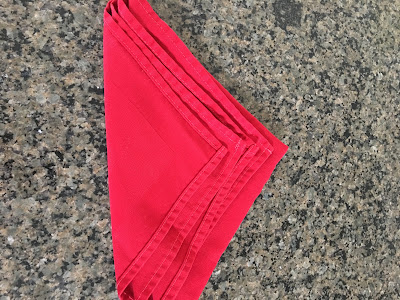
You will end up with a triangle that has layers
Next...flip over and fold each side of the triangle to the opposite side one over the other.
It becomes a bundle.
Flip over once again so you can see the layers of the Christmas tree.
Fold in each point of the layers underneath each other
Once all the points are folded inside you are done!
You can add a candy cane or a small chocolate for an "ornament" for your guests.
Here is my quick fast tutorial of the Christmas tree napkin fold
Hope you use this fun napkin fold this Christmas!
Christmas cupcake toppers using Cricut machine
By The Style Sisters - Friday, November 23, 2018
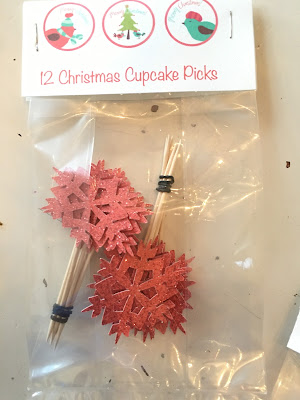
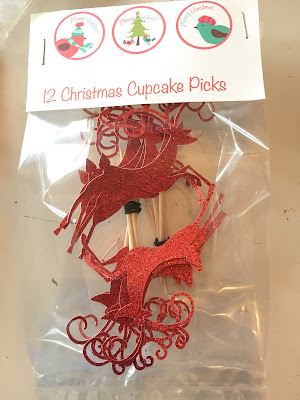
I have had so much fun making these adorable
Christmas Cupcake toothpicks this year!
I actually made these for my sisters Craft Fair she is going to!
I love how they turned out in the pastel pink, green gold and red.
Even the girl at the UPS store wanted to buy some when I went to ship them to my sister!
I just love the look of them!
If you don't have Cricut machine you really ought to ask Santa for one this year they are AMAZING!
Click here to learn more about CRICUT
How to create a Festive Hot Chocolate Bar
By The Style Sisters - Wednesday, November 21, 2018
I have seen so many cute ideas for Hot Chocolate Bars so I decided to create one for my family. I used my 3 tier metal stand and filled it with white mugs tied with bakers twine and printable cup of cheer tags see link below to print.
 |
| Hot chocolate bar |
I filled little bowls with Candy canes, M & M's, chocolate kisses, snowflake sprinkles and a little shaker of cinnamon to add some yumminess to a cup of hot cocoa. I keep my chocolate mix in a glass jar with a lid.
 |
| Hot chocolate bar, cup of cheer |
I also have marshmallows in the small white bowl with a lid on to keep them fresh. Adding fresh greenery around the base of the stand, a small red and green plant and small ornaments tucked in here and there help to create a festive Chocolate bar.
 |
| Cup of cheer |
My black and white polka dot plates are perfect to hold cookies or donuts.
 |
| Hot chocolate bar |
I filled the middle tray with a strand of red beaded garland to nestle my little red and white striped bowls filled with some of the goodies.
 |
| Hot chocolate bar sprinkles |
Tiny glass vases are used to hold candy canes and other candies
 |
| Hot chocolate bar |
These darling "cup of cheer" tags are a free download from
I'm  |
| Hot chocolate bar |
I love this time of year... Sitting by the fire drinking a nice cup of hot cocoa. Now....all we need is a little bit of snow :)
 |
| Hot chocolate bar |
Cheers!
Karin
Linking to
How to chalk paint a dresser with Annie Sloan Paris grey
By The Style Sisters - Tuesday, November 20, 2018
I just can't begin to say enough good about Annie Sloan Chalk Paint or as many refer to it as
ASCP
It. Is. Seriously. Worth. It's. Weight. In. Gold.
So easy, no fumes, no priming, no sanding, super fast ...yes I am having a love affair with it!
We started with the dresser looking like this on the right...all beige with a natural looking wood top.
Kinda country bumpkin looking Not what we were going for
We wanted a French look for mom's room
We knew these pieces had good bones so once painted it would really look nice.
So we got to work!
We took all the drawers out and removed all the handles, the center door and its hinges and got out the paint and paint brushes.
We just used regular ole paint brushes which worked great but I would maybe spend a little money on some nice brushes because I am telling you once you start working on a piece of furniture and you see how easy and pretty it looks you are going to be hooked and want to paint a lot of other pieces so you might want a nice brush that does not fall apart or leave brush hairs on your wet paint.
We painted this dresser right in my moms room.
Just use something to place under the legs to lift them up and a drop cloth..simple!
The paint dries super fast especially here in the West where we have really dry air
One coat could actually have been enough but we went with 2 coats but it hardly took any paint
Once the paint is dry...in like 10-15 minutes you can start waxing the piece with Annie Sloan Wax
We used a rag on this particular piece to wipe on the wax and then you simply wipe/buff it off leaving a nice patina.
You can use a brush to get into the small crevices and Annie Sloan makes some beautiful brushes that work great.
We purchased one of her brushes for our Entertainment center that we finished recently.
I will soon be posting all about that big project!

It turned out so beautiful! You can see more of the reveal of the Master Bedroom Here
For the headboard we painted outside so we could lean it up against the garage door the sun dried the paint almost instantly
Isn't it amazing what a little bit of paint can do to make an old piece of furniture new again?
Ta Ta For Now
Karin
Linking to


