Turn Thrift Store chair into French Beauty...the EASY WAY!
By The Style Sisters - Saturday, April 22, 2017
Turn a thrift store chair into French Beauty the EASY WAY!!!
Yes this beautiful French looking chair came from a Thrift Store!!

Here is the before...it was a yucky old antiqued yellow chair with 80's striped fabric on it. I swear I remember seeing this chair in some of my friends houses growing up!

But notice the curvey french looking legs? uh huh Love that!

Notice the cane backs all in perfect condition...uh huh I love that too!

Notice the cute girl working so hard to help her mom uh huh I LOVE LOVE that! This is Madeline my oldest daughter from Eyes of Mad Blog who does the most amazing baby showers!!
All we did to these chairs was lightly sand and paint and then we wipe off the paint in places so they looked like they had an old patina to them. The cool thing about this is...because they were old the old oils came through and slightly yellowed the white paint to make them really look like they have a patina on them.

Then we sanded in a few spots here and there to make it look weathered.
Here is my beauty all gussied up. No primer, no having to be so careful... the messier the better.

Of course I had to change out that rocking 1980's fabric to something a little more cottage beachy looking. I found this gorgeeeous fabric at Joann's fabrics and had a coupon and got it for a great price....although I can't remember how much I paid for it now but it was good. We took off the old and stapled on the new!
I am so thrilled with how they turned out and so simple...all that was need was.just a little free child labor he he he
Uh Huh I LOVE THAT!! AND OF COURSE I LOVE HER TOO!!


After we put the chairs in the dinning room and oohed and ahhed over the new chairs I was not liking my beige parsons chairs that sit at each end of the table.....so...here is what I did to tie them into the room...you are going to love this! I simply took some of my left over fabric folded into thirds and tucked one end into the seam where the seat and back come together and brought the fabric up and over the top to hang down the back of the chair......it just kind of hung there but I knew I was on to something.... I decided it needed some "jewelry" I scrounged around in my messy buffet drawers and found I had these old goldish looking sea shell napkin rings.... so I cinched the flowing fabric around with some leftover cording (stuff you use to make pipping). It looks like rope but really soft and attached the sea shell to finish it off and
HELLO MY CUTENESS! NO SEWING INVOLVED!!

Just think I can change out the fabric on a whim for a different look!....I LOVE LOVE LOVE THIS!!
(mine and my sisters fav saying...it has to be amazing to get 3 loves)
Here is my Gorgeeeous dining room all prettied up.

I could see the potential of it when I saw it sitting in the store.
I was featured on The DIY Show off!

I was featured on The DIY Show off!
Tomorrow I will tell you more about the other thrift store items in this room...
I am linking up to some fun linky parties
Market Yourself MondayMad Skills @ Mad In Crafts
Inspire Me Monday @ Singing Three Little Birds
Show Off Your Cottage
Creative Me @ The Southern Institute
Pink Hippo Party @ Pinkapotamus
Faux Roman Shade using No Hardware!

I love how cute these Roman shades turned out!
Really easy and no hardware!
I spent last week at my daughter Madeline’s house helping her make these faux roman shades without hardware. Madeline was getting her house ready to put on the market in Idaho Falls and boy did we crank out lots of projects!
Not only did we paint Banisters and stair skirts (which I didn’t even know that is what they are called but I do now!) I LOATHE painting them…. actually not the paint part, it was all the puttying and sanding all the holes and lumps and bumps from 1980’s carpet. You know what I’m talking about… when they would carpet up those areas urrrghghgh……I must really love my daughter an awful lot to do all that!
YOU CAN PURCHASE THE FABRIC BELOW


I have moved this tutorial post to here on https://karinskottage.com/2016/03/faux-roman-shade-tutorial-using-no.html
Sorry for the inconvenience but all directions are now over there.
Plus here is another shade tutorial over at Karins Kottage
You can see the other Roman Shade tutorial Here


Isn't this adorable? My daughter and I just made this marigold pumpkin pomander this afternoon. I have like a bajillion marigolds growing in my backyard and I had seen this idea on Better Homes and gardens so I decided to try it!

I had two small urns in my storage and some dry floral foam and I bought a little wet floral foam so I can keep the flowers alive :)

We used the dry floral foam in the bottom of the urn to lift up the wet foam above the urn but it was wobbly so I used a bamboo skewer to attach the two floral foams together. It worked perfectly!


Then we started adding the flowers row by row until we covered the enter foam.

You can watch our periscope tutorial that we made today on how we made the pomader.
Linking up to
Ribbon Wands

I am in the process of making ribbon wands for my daughters wedding and I am in love with the colors my daughter has chosen,

I cut the ribbon 24' long and sewed three of them together at one end

I just kept sewing them in a long line and then cut them apart

I attached each ribbon to a 12" dowel using double stick tape and it worked perfectly!!

I wound it around and it stuck to itself and holds perfectly!!


These would be perfect for a little girls party too!

Let me know if you make some too!
My newest project- Paneling above the fireplace to bring in that beachy cottage look!

My latest project that was super easy and fun to do was paneling the area above our fireplace. I used what is called fashion board from Lowes. A large panel is under $10.00! It only took one board with lots left over.
Sunburst DIY, Roman Shade tutorial, Easy Cornice DIY
By The Style Sisters - Monday, April 06, 2015
Finally here is the reveal of my sisters family room makeover!!

You may remember the post about the DIY Sunburst we made to go above the TV as well as the cornices to go above the windows... you can find the cornice tutorial here....we used the same process but different fabric. In the breakfast room right next to this room we made some Roman shades for her french doors too!
So now I am ready to show you the entire room completed!
First lets begin with where we started..

This particular wall has some fun wall decorations on it but they were spaced to far apart..
Note the top left ceiling medallion that is what we used to make the new Sunburst!
I love to use what we have to create something new.

On the main wall the TV was blocking the cute old window and there was no fabric window treatments above the blinds

We decided this desk area needed some ooomph with some shelving to create a built in look

This is the during picture of the room before we moved the large shelving unit on the right over to the other side of the room where the desk is. Also you will notice we took the clock out of the room and softened the windows with some easy cornices we made
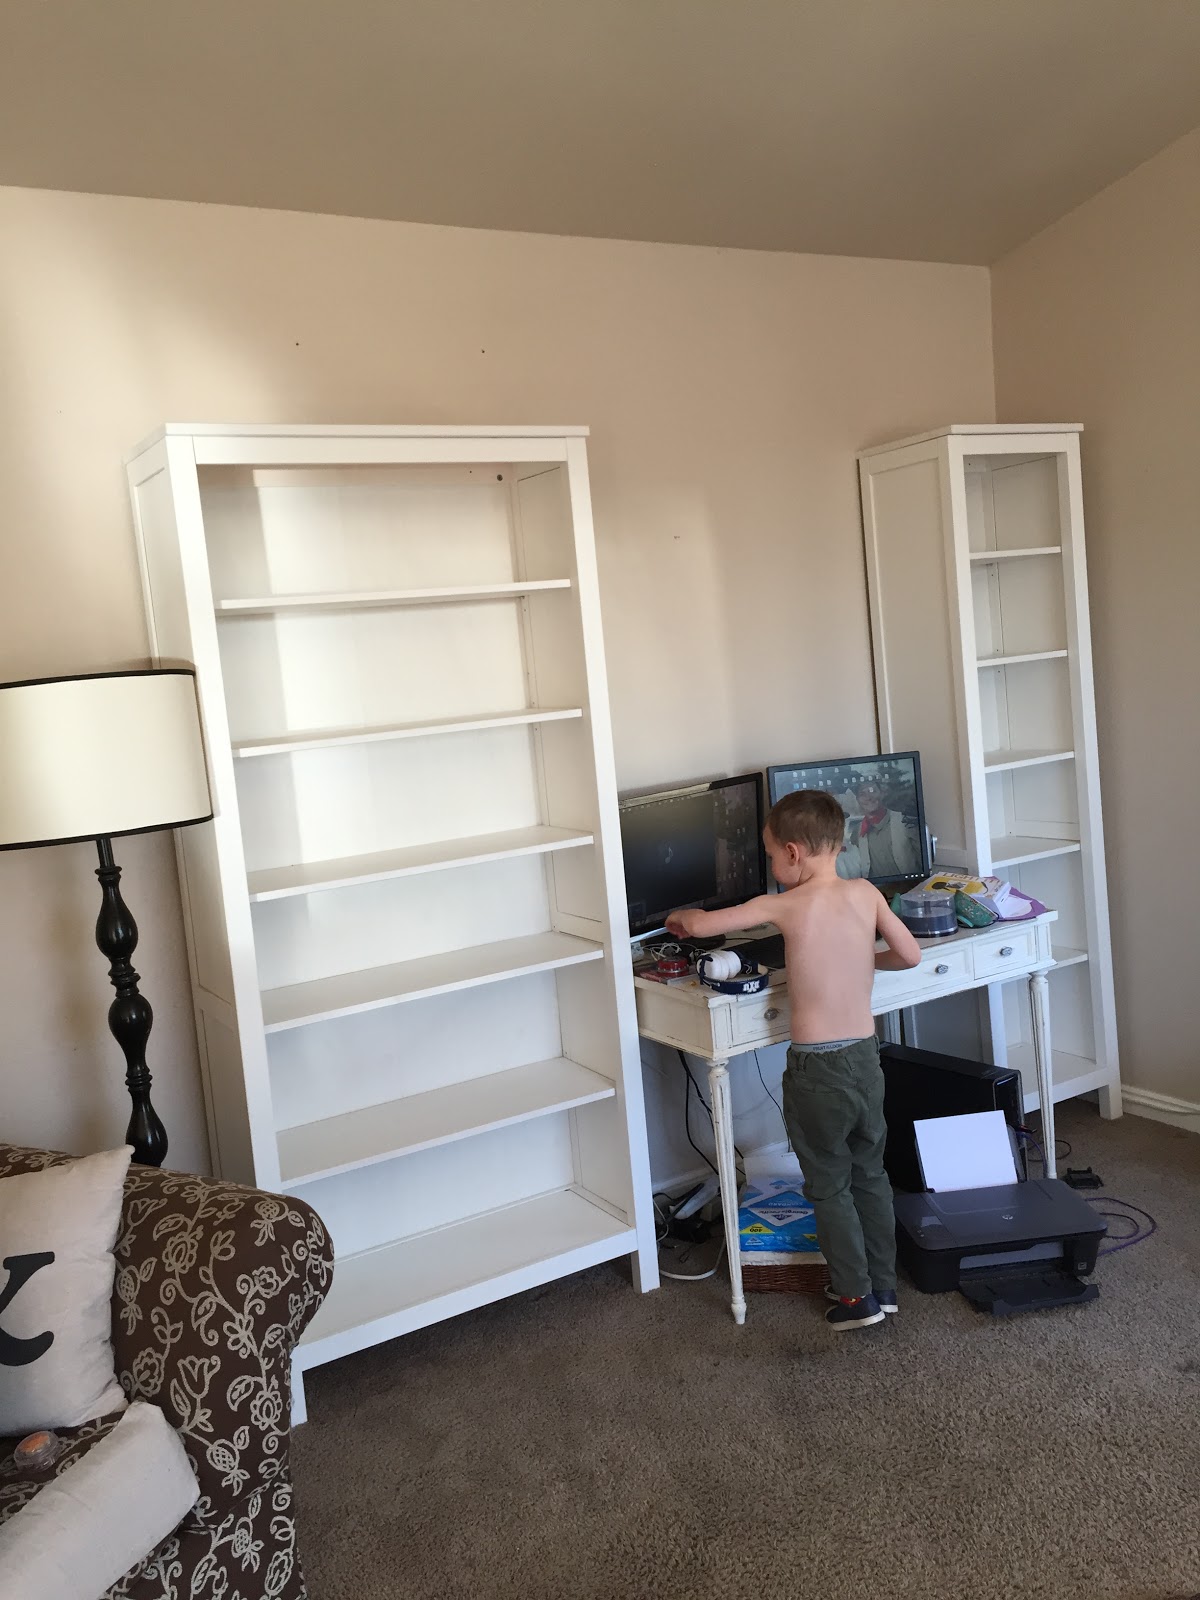
We brought up the skinny shelving unit from another room in the house and placed it on the right side of the desk then we moved the big shelving unit over from the other side of the room and put it on the left side of the desk to create a built in look.
Tiff plans to add some shelves above the desk as well.
Cute Max is Tiff's youngest and he was "helping" us :)

It just made a huge difference flanking the desk with shelving!
We went through all the books and nick knacks and chose the best ones to create a clean look.

Moving the large brown chair to the corner and hanging the old window above it and adding a floor lamp completed the look on this side of the room

After taking the down the old window and clock we tried this idea of multiple frames above the TV but Tiff wanted something bigger up there and that's when we came up with the idea of the Sunburst!

Spray painting one of the ceiling medallions grey and adding paint sticks created such a fun large focal point.
Adding the fabric cornices also helps to complete the look and bring in some color and pattern

We found some fun orange and grey patterned pillows that really help to tie the room together and make this sofa feel comfy.
Tiff had this large black frame and first we used it to frame this metal number 5 but she ended up liking a spray painted letter K the best.

Over in the corner we used some of her wall art (ceiling medallions) hung one over the other and it really worked perfectly!


We would love to hear what you think!
Karin