How to Make an Easy American Rag Flag for 4th of July Decor
Edit Post
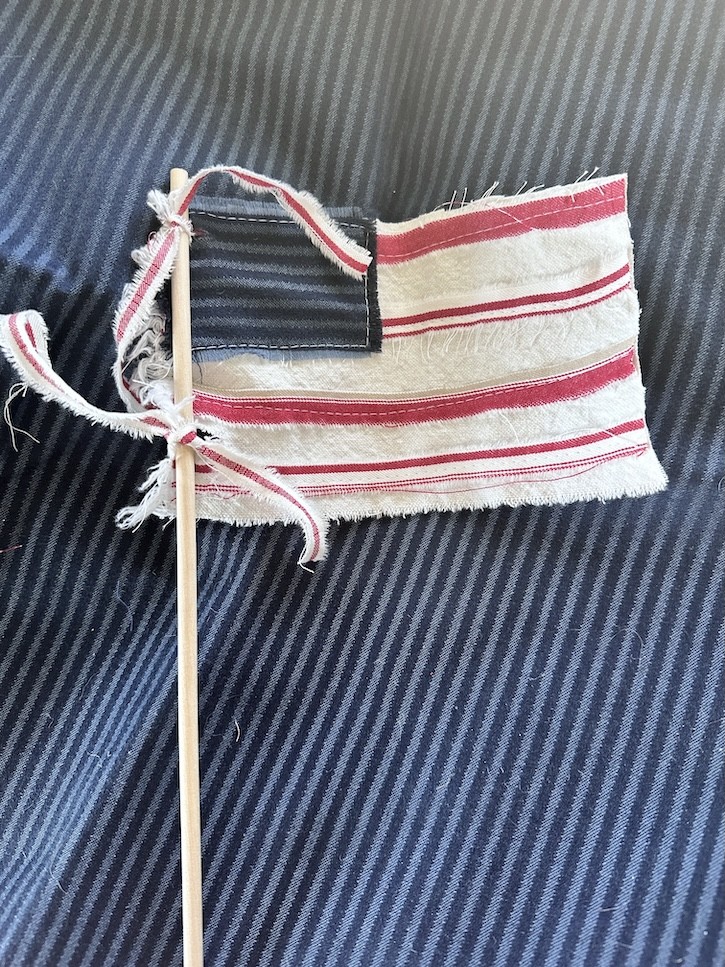
A Simple and Charming 4th of July American Rag Flag DIY
I've been seeing all kinds of adorable American rag flag DIY ideas popping up lately and I just had to make one for myself! This easy DIY project is perfect for using up leftover scraps of fabric—and the end result is so darling and full of homespun charm. Whether you're sewing, gluing, or hand-stitching, this little flag is the perfect touch for your 4th of July decorations.
Let me walk you through how I made mine and how you can make one (or five!) too.
Supplies You'll Need:
- Drop cloth (or neutral canvas fabric)
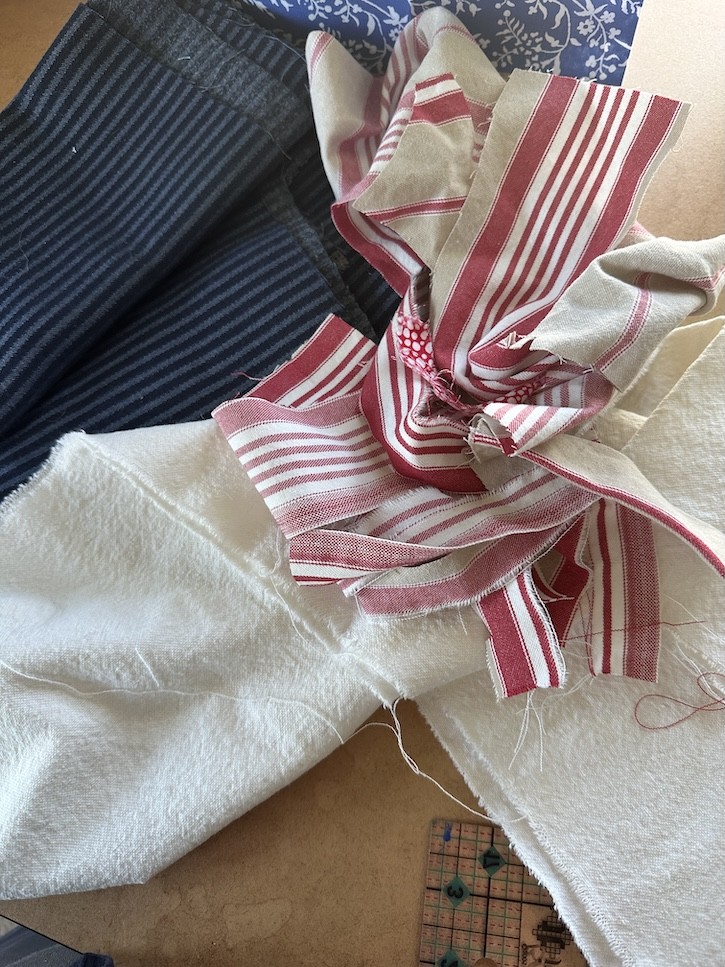
- Red, white, and beige fabric scraps
- Dark denim fabric for the “stars” section
- Wooden dowel
- Needle and thread, hot glue gun, or sewing machine
- Scissors
- Ruler or measuring tape
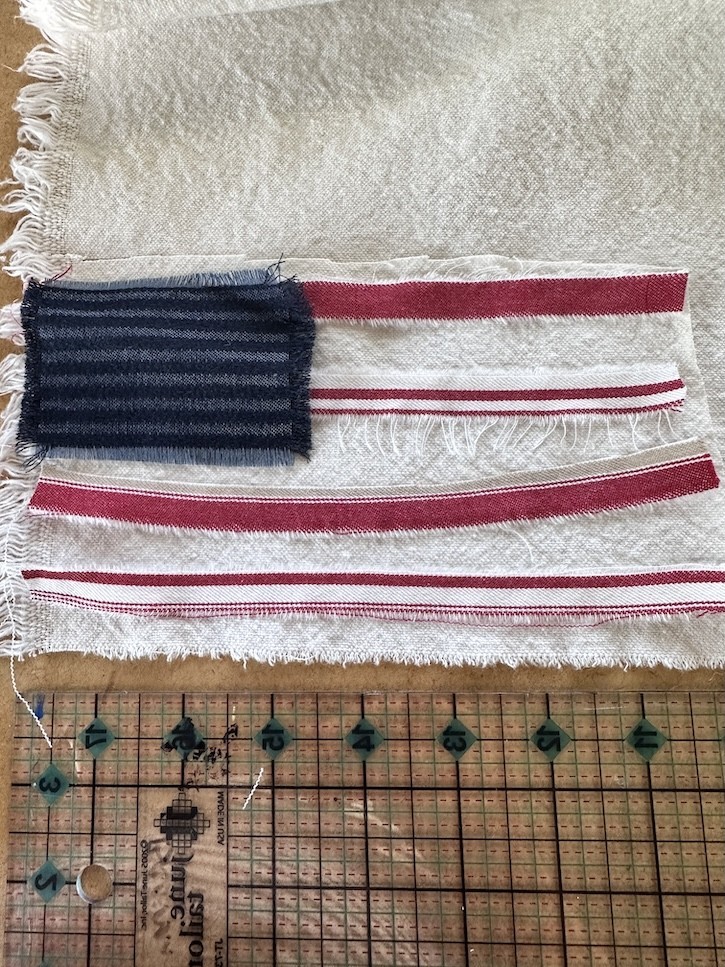
Step 1: Create the Base
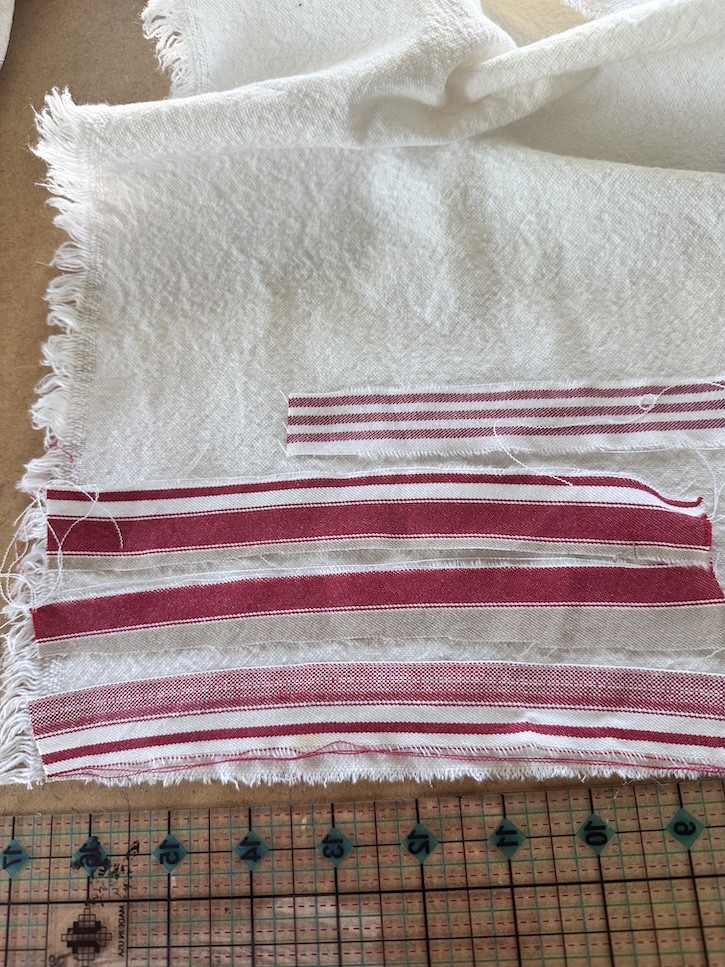
Start by cutting your drop cloth into a rectangular shape. I chose 6x8 inches but feel free to play around with the size to fit your space or display idea. Once it’s cut, pull some threads around all four edges to get that perfectly imperfect, rustic farmhouse look we all love.
Step 2: Add the Stripes
Tear or cut your red and white fabric into long, skinny strips. The torn edges add that sweet vintage texture that makes this flag feel like something you'd find in your grandmother’s attic (in the best way!).
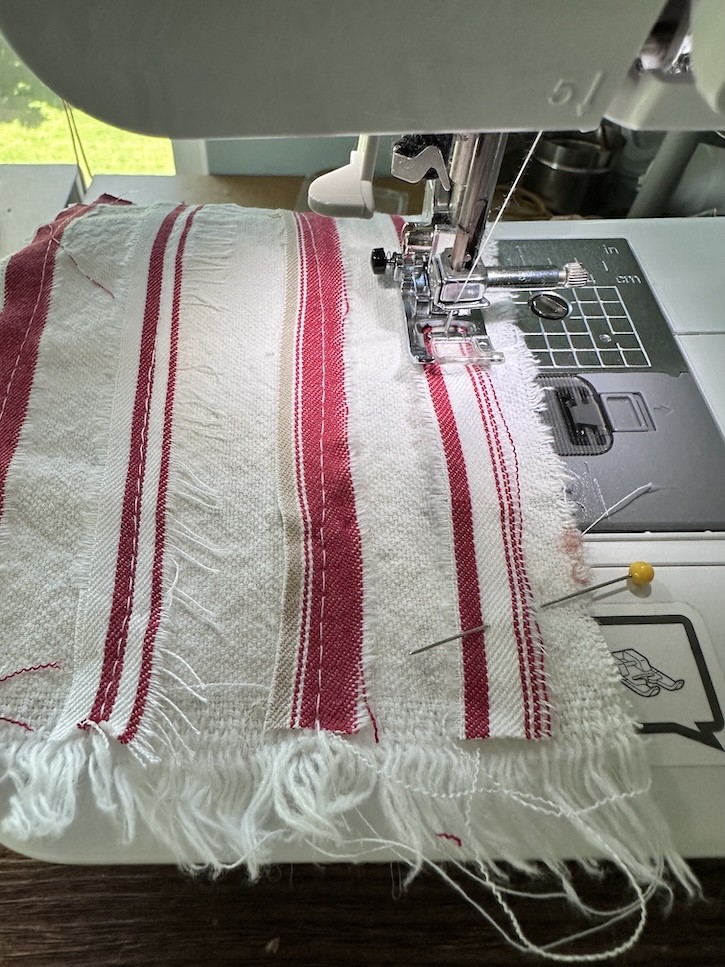
I laid mine out across the drop cloth base first to get the spacing just right, then stitched them on using my sewing machine and a long stitch. If you don’t have a sewing machine, a simple hot glue gun works just fine—or grab a needle and thread to add an even more handmade touch.
Step 3: Attach the Denim “Stars” Section
Next up is the top left corner. I cut a small rectangle of dark denim to represent the stars section and frayed the edges a bit. Then I stitched it down securely on top of the stripes. You could even hand-stitch a little star or two with white thread if you’re feeling fancy!
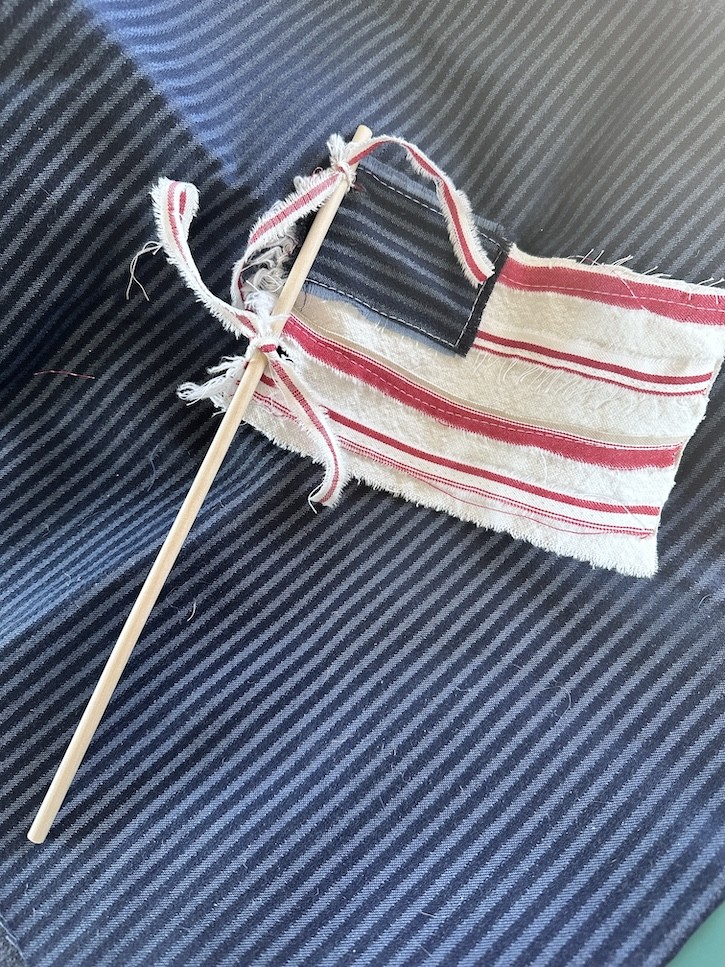
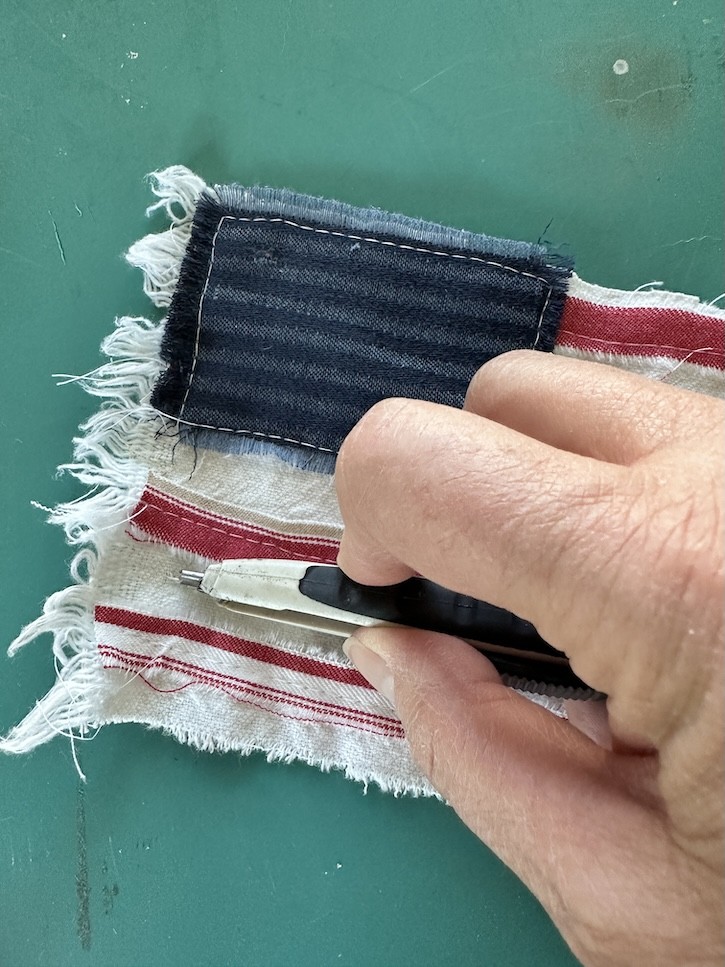
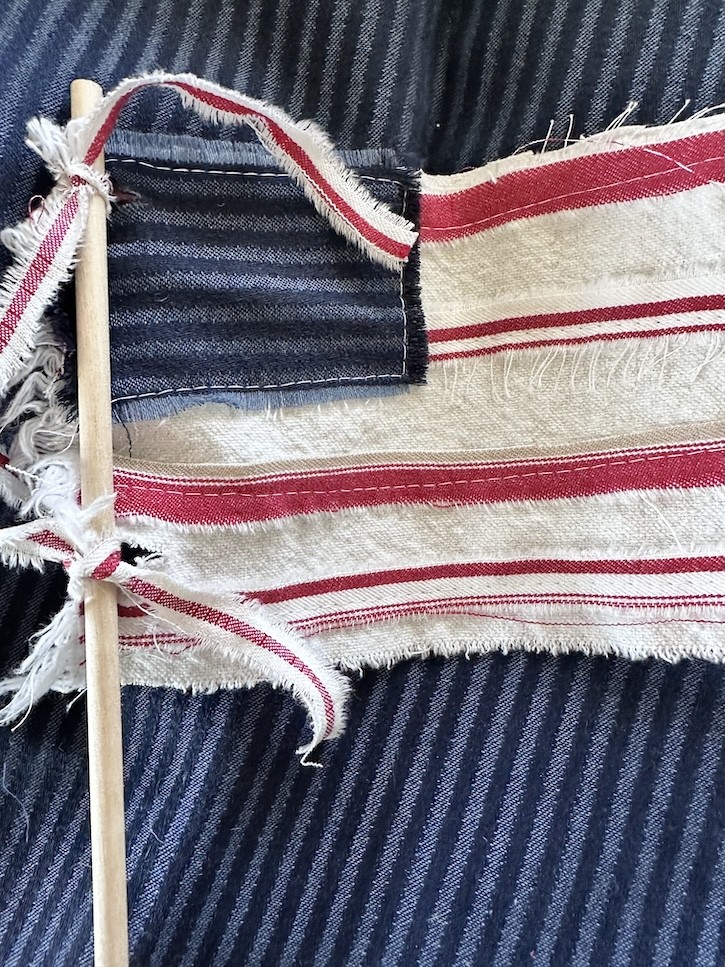
Step 4: Attach to a Wooden Dowel
To create your flagpole, use a thin wooden dowel. I made two small slits on the left side of the flag—one near the top and one near the bottom. Then I ripped two thin strips of drop cloth and threaded them through the slits to tie the flag onto the dowel. So easy and so cute!
Display Ideas for Your Rag Flag
Now that your American rag flag is done, it’s time to decorate! Here’s how I’m using mine:
- Grouped in a vase for a charming centerpiece
- Tucked into a wreath for a front door refresh
- Placed in a vintage pitcher on my entry table
- Used as a party favor or table setting detail
I’m planning to make a whole bouquet of rag flags to use as a 4th of July centerpiece—wouldn’t that be adorable in a galvanized bucket or rustic vase?
Hot Glued Rag Flags
 |
| Hot glued rag flag |


Related Posts You Might Love:
Easy Patriotic Ribbon Wand Craft
DIY Bandana Napkins for 4th of July
Red, White and Blue Backyard Entertaining
Tell Me Your Ideas!
Have you ever made an American rag flag? I’d love to know how you’ve used them in your home. Tag me on Instagram @KarinsKottage or leave a comment below so I can see your creativity!
Happy 4th of July crafting, friends! 🇺🇸
- Post
Notifications